| This documentation is out of date.
The new version of the documentation is here: https://cannylogic.com/docs |
Difference between revisions of "Interaction with equipment"
| [unchecked revision] | [unchecked revision] |
(→Запись в контроллер функциональной диаграммы) |
(→Завершение сеанса работы с контроллером) |
||
| Line 31: | Line 31: | ||
|} | |} | ||
| − | === | + | === Completion of session with the controller === |
| − | + | After loading software has finished, for safe work completion, it is sufficient to only disconnect the USB cable from the controller. However, to make sure that the software recording process has been completed, before physically unplugging the controller it is recommended to, select «Device» → «Disconnect» on main menu, or click [[File:4_8_4_1.png]] on toolbar, then controllers' green LED stops flashing. | |
=== Получение технической информации о подключенном контроллере === | === Получение технической информации о подключенном контроллере === | ||
Revision as of 12:17, 8 April 2016
Интегрированная среда разработки CannyLab предоставляет пользователям возможность загрузки в контроллер системного программного обеспечения, необходимого для выполнения функциональной диаграммы, а так же самой функциональной диаграммы.
Contents
- 1 Connecting the controller to the PC
- 2 Loading system software in the controller
- 3 Loading functional diagram in to the controller
- 4 Completion of session with the controller
- 5 Получение технической информации о подключенном контроллере
- 6 Удаление функциональной диаграммы из памяти контроллера
- 7 Удаление системного ПО из памяти контроллера
- 8 Смотри также
Connecting the controller to the PC
Disconnect the controller from an external power supply and connect it to a PC via a standard "miniUSB" cable, the green LED will turn on at the same time. When controller connected first time, Windows reports the discovery of a new standard device and automatically install the driver for it.
Linking CannyLab with the controller connected to the PC is done by selecting "Device" → "Connect" of the main menu or by pressing ![]() from toolbar.
from toolbar.
If communication with the controller is successful, the controller's green LED starts flashing, in the CannyLab status bar will be displaied information about the connection and the presence or absence of the connected controller software, will be available menu items and toolbar buttons relevant to the work with the controller.
Loading system software in the controller
Loading system software in to connected controller carried out through the menu «Device» → «Firmware» → «Write», herewith, the choice of the controller system software file is performed in the pop-up dialog box.
Writing system software in to PLC CANNY 7 takes about a minute. Information on the progress of the write process will be displayed in the dialog box. At the time of writing, the frequency of the controller green LED flickering increased.
| Note: | In case of existance previously recorded system software and functional diagram and confirmation request from the user they will be erased with new system software. |
Loading functional diagram in to the controller
Loading functional diagram is only possible if controller already contains system software. Loading currently opened in CannyLab functional diagram to the controller possible via the menu «Device» → «Diagram» → «Write» or by pressing the button ![]() on toolbar.
on toolbar.
Information of the loading progress will be displayed in the dialog box. At loading time, the controller green LED will flicker at higher frequency.
| Note: | In case of existing diagram in the controller upon request confirmation from the user, it will be erased. Previously written system software will remain unchanged. Loading diagram in the controller is usually faster than writing system software. |
Completion of session with the controller
After loading software has finished, for safe work completion, it is sufficient to only disconnect the USB cable from the controller. However, to make sure that the software recording process has been completed, before physically unplugging the controller it is recommended to, select «Device» → «Disconnect» on main menu, or click ![]() on toolbar, then controllers' green LED stops flashing.
on toolbar, then controllers' green LED stops flashing.
Получение технической информации о подключенном контроллере
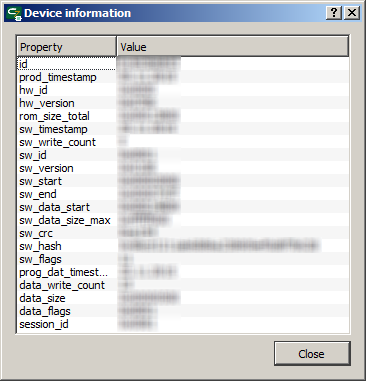
Для получения специальной технической информацию о подключенном контроллере необходимо выбрать пункт «Устройство» → «Информация» главного меню программы, или нажать кнопку ![]() панели инструментов. Информация об устройстве будет отображена в специальном окне.
панели инструментов. Информация об устройстве будет отображена в специальном окне.
Удаление функциональной диаграммы из памяти контроллера
Для удаления функциональной диаграммы из памяти контроллера необходимо выбрать пункт «Устройство» → «Диаграмма» → «Стереть» главного меню программы, или нажать кнопку ![]() панели инструментов. После запроса подтверждения у пользователя, диаграмма будет стерта из памяти контроллера.
панели инструментов. После запроса подтверждения у пользователя, диаграмма будет стерта из памяти контроллера.
Удаление системного ПО из памяти контроллера
Для удаления системного ПО из памяти контроллера необходимо выбрать пункт «Устройство» → «Системное ПО» → «Стереть» главного меню программы. После запроса подтверждения у пользователя, память контроллера будет очищена.
| Примечание: | При удалении системного ПО из памяти контроллера, пользовательская диаграмма так же будет стерта. |
