| This documentation is out of date.
The new version of the documentation is here: https://cannylogic.com/docs |
Difference between revisions of "CANNY Lab Main window"
| [unchecked revision] | [unchecked revision] |
(→Диалог поиска функционального блока по его порядковому номеру) |
(→Диалог настройки параметров) |
||
| Line 220: | Line 220: | ||
[[File:4_4_6_1.png]] | [[File:4_4_6_1.png]] | ||
| − | === | + | === Settings dialog === |
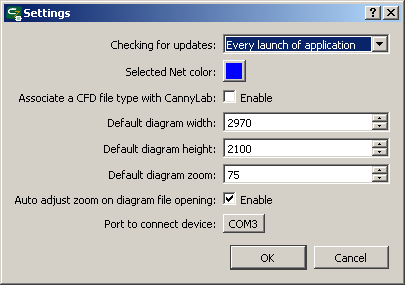
| − | + | Access to CannyLab configuration parameters dialogue can be obtained by selecting "Tools" → "Settings" from main menu. | |
[[File:4_4_7_1.png]] | [[File:4_4_7_1.png]] | ||
| Line 228: | Line 228: | ||
{| | {| | ||
|- valign="top" | |- valign="top" | ||
| − | |width="300px"| | + | |width="300px"|Checking for updates - |
| − | | | + | |Selecting the frequency to check for new software versions<br>[[File:4_4_7_2.png]] |
|- valign="top" | |- valign="top" | ||
| − | | | + | |Selected Net colour - |
| − | | | + | |Choose selected connection line colorus |
|- valign="top" | |- valign="top" | ||
| − | | | + | |*.cfd File Association with CannyLab- |
| − | | | + | |Associates functional diagrams files type with the current version CannyLab |
|- valign="top" | |- valign="top" | ||
| − | | | + | |Default diagram width - |
| − | | | + | |The width of the diagram when creating a new file |
|- valign="top" | |- valign="top" | ||
| − | | | + | ||Default diagram hight - |
| − | | | + | |The height of the diagram when creating a new file |
|- valign="top" | |- valign="top" | ||
| − | | | + | |Default diagram scale - |
| − | | | + | |The scale of diagram display area when creating a new file |
|- valign="top" | |- valign="top" | ||
| − | | | + | |Automatic selection of scale when opening a file - |
| − | | | + | |Diagram Viewing Mode when opening a file (if diagram scale selection enabled, when opened, will, if possible, completely fit the screen - is displayed on an appropriate scale) |
|} | |} | ||
| − | |||
=== Список горячих клавиш === | === Список горячих клавиш === | ||
Revision as of 13:22, 6 April 2016
CannyLab user interface consists of a single window - the main program window.
Contents
Main window
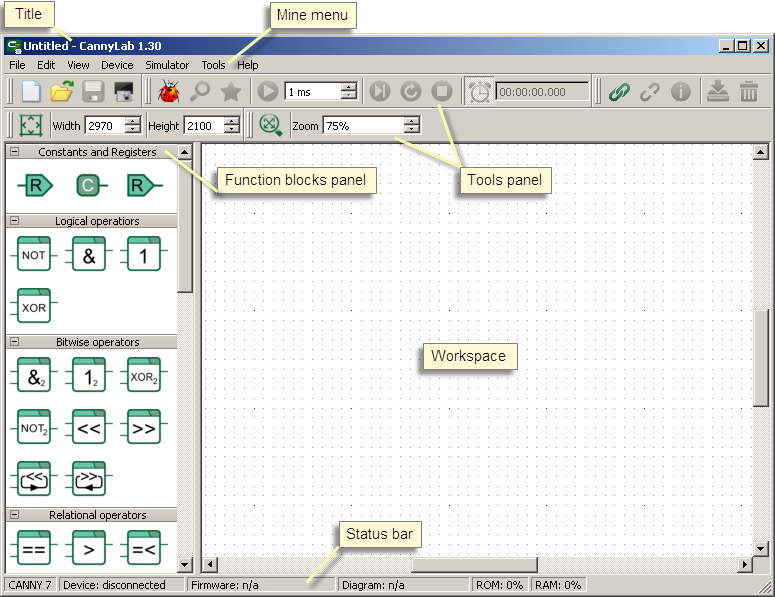
The main window is divided into several areas:
- window title;
- main menu;
- toolbar;
- function blocks panel;
- workspace;
- status bar.
Depending on the current operating mode of the editor, some of CannyLab menu items and panels may not be available or hidden.
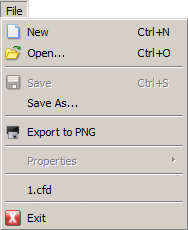
Menu "File" contains commands to work with CannyLab files.
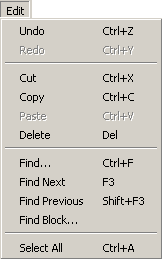
Menu "Edit" contains editor appearance adjustment commands.
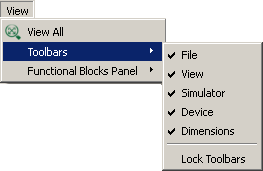
Menu "View" contains toolbar view customization and function block panel representation.
|
|
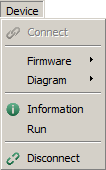
Menu "Device" contains commands to work with the controller.
| - load firmware to the controller; | |
| - erase controller firmware; | |
| - load user's functional diagram; | |
| - erase user's functional diagram. |
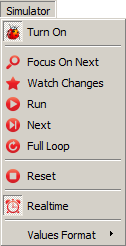
Menu "Simulation" contains controller software emulation mode control commands in the CannyLab environment.

|
- setting decimal number system; |
| - setting hexadecimal system; | |
| - setting binary system; | |
| - setting character data mapping. |
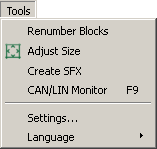
Menu "Service" includes service commands and CannyLab settings.
|
|
| - reorder functional blocks numbers on the diagram; | |
| - creation of autonomous firmware flash file; | |
| - start CAN-monitor; | |
| - change CannyLab settings; | |
| - CannyLab interface language selection. |
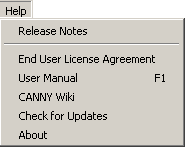
Menu "Help" provides links to this guide and information about the program.
|
|
| - View CannyLab program changes history file; | |
| - open CannyLab reference guide; | |
| - get information about program current version. |
Toolbars
Toolbars allows to access the most popular commands of CannyLab.
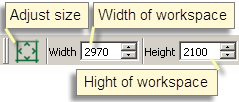
Desktop Control Panel allows to scale the image to the workspace and change its dimensions in pixels. To quickly zoom in/out, rotate the mouse wheel while holding down the button «Ctrl» keyboard.
Workspace
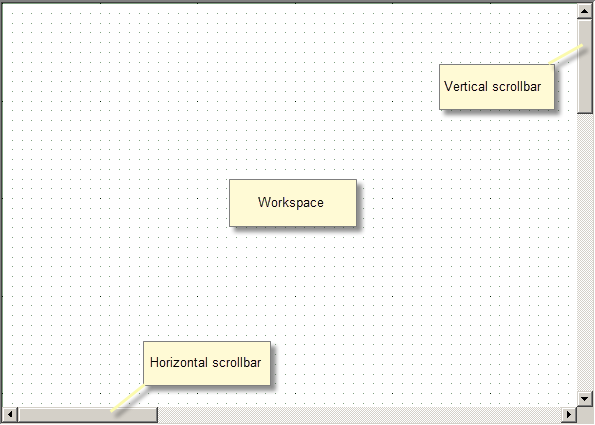
Workspace is designed to display, edit, and debug functional diagrams. The background of the workspace is a grid that facilitates the positioning of functional diagram elements. To move over the diagram displayed in the workspace used the vertical and horizontal scroll bar, mouse wheel or arrow keys.
Status bar
The status bar displays: for which controller current functional diagram designed, the presence of communication with the controller, the presence of the system software and functional diagram in the connected controller. In addition, in the simulation mode, the status bar displays information about controller resources used by custom diagram.
Functional Blocks Panel
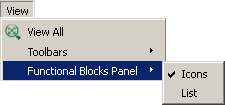
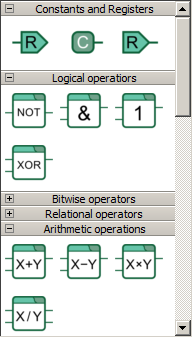
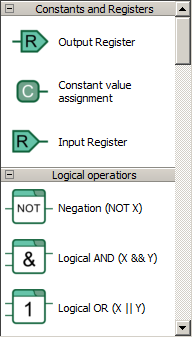
Functional blocks panel contains all available blocks types for use in the construction of functional diagram. Functional blocks in this panel are arranged in groups by purpose and, depending on display setting may be presented as icons or a list. Scroll functional blocks panel can be performed using the vertical scroll bar or the mouse wheel.
Two options displaying functional blocks panel:
|
|
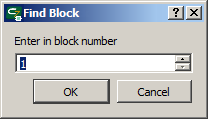
Functional block search dialogue by its ordinal number
Access to the functional block search dialogue by its ordinal number can be obtained by selecting "Edit" → "Find block" from CannyLab main menu.
Settings dialog
Access to CannyLab configuration parameters dialogue can be obtained by selecting "Tools" → "Settings" from main menu.
Список горячих клавиш
| F1 | Открыть справочное руководство; |
| Ctrl+N | Создать новый файл диаграммы; |
| Ctrl+O | Открыть файл диаграммы; |
| Ctrl+S | Сохранить файл диаграммы; |
| Ctrl+A | Выделить все; |
| Ctrl+Z | Отмена последнего действия при создании и редактировании диаграммы; |
| Ctrl+Y | Возврат последнего отмененного действия при создании и редактировании диаграммы; |
| Del | Удаление выделенных элементов диаграммы; |
| Esc | Выход из режима редактирования сети; |
| ←, ↑, →, ↓ | Сдвиг экрана отображения рабочей области влево, вверх, вправо, вниз; |
| PageUp, PageDown | Сдвиг экрана отображения рабочей области на страницу вверх, вниз; |
| Ctrl + колесо мыши | Быстрое изменение масштаба отображения рабочей области; |
| Alt + колесо мыши | Горизонтальная прокрутка рабочей области редактора; |
| Shift + колесо мыши | Ускоренная вертикальная прокрутка рабочей области редактора; |
| Нажатое колесо + движение мыши | Перемещение поля диаграммы внутри рабочей области («перетаскивание»). |
